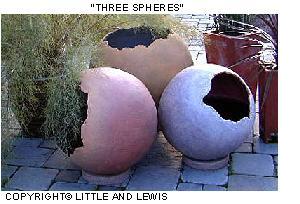
Hypertufa Hollow Garden Spheres
Want to learn How to Make a Hollow Garden Sphere using Hypertufa?
Let Me Share My Tips To Help Your Project Be A Success!
I think that a garden sphere made with hypertufa or concrete is one of the neatest garden art items you can make.
Not only are round objects always interesting in a garden space, but there is a little bit of a challenge to have it come out looking great. This article will discuss the methods and tips that will help insure your success when making a HOLLOW garden sphere.
Now, just in case you want to make a SOLID sphere, please click here: How to Make Solid Garden Spheres
There is a degree of difficulty when casting a hollow sphere.
Whether you’re using a hypertufa or concrete mixture, the principles for making the sphere are identical. But, this project is certainly one that even children can be successful doing (with adult supervision at all times for safety’s sake).
This project requires a well-made INFLATABLE / DEFLATABLE beach ball or exercise ball.
Exercise balls can be found in most sporting goods stores. The reason I suggest you purchase a well made one is for the simple fact it can be RE-USED. I guarantee that once you make one garden sphere … you’ll want to make another, and another. Friends are going to ask for one, too!
OK … back to the inflatable ball for your casting form. Here’s where we get into some ins-and-outs with variations. Keep in mind that the BIGGER the size of the sphere you want to cast, the HEAVIER and possibly more unmanageable it’s going to be. Where are you going to keep it while it’s curing, etc? You need to really think ahead.
Hollow Garden Sphere: Let’s Begin
Follow These Steps to Make a Hollow Garden Sphere
This is important, so listen up! Grasp the deflated ball and hold it in the middle with the stem pointing up. Approximately how large a circumference does it have when deflated?? What I am getting at here is this: you are going to deflate the ball once your mixture hardens, and then carefully pull it out through the “hole” that you’ve left in your sphere. I hope this illustration clearly shows what I am trying to explain to you.

Make a mental note of, or jot down how large a hole you’ll need to leave when patting on your mixture!
Inflate the ball. Make sure the inflation stem is securely closed.
Apply a generous coating of “release agent”.
Cut some strips of hardware cloth (available in hardware stores — it’s a metal mesh product and comes in small rolls for around $8.00). It’s up to you how wide to make the strips. What you want to do is to SMOOTHLY wrap the ball with the strips.
Criss-cross the hardware cloth strips around the entire ball. You DO NOT have to cover the entire ball’s surface … unless it’s REALLY large. The strips are beneficial because they will add extra reinforcement once your garden sphere has cured.
Application of the Wet Mixture
In Most Instances More Than One Layer Will Be Needed
Pat on a 1/2-inch thick layer (give or take) of your concrete or ‘tufa mixture.
Leave an area around the inflation stem “bare” – no mixture applied. Just like I explained above. This is where you will pull out the deflated ball once your mixture hardens.
Allow the sphere to harden. Deflate and carefully remove the ball.
Apply more ‘tufa or concrete mixture to your sphere, building up to the desired thickness. You may need to do this in layers, depending on how thick-walled you want it to be.
When you’re done applying the layers, you’ll need to carefully cure your garden sphere.
Some Final Expert Tips
Take Your Time and Follow Each Step … And Practice DOES Make Perfect!
Whether you are making a concrete or hypertufa garden sphere, you may want to leave a few very small open areas on the sphere when applying the first layer. And the reason??
Any concrete/cement mixture (hypertufa does contain cement) expands and contracts when curing. By leaving a few little open areas, you are helping insure that the first layer doesn’t CRACK while curing.
As with all ‘tufa or concrete projects, I cannot give precise instructions. Practice makes perfect! Especially where hypertufa recipes and the like are concerned.
It’s just like baking a cake … your success comes with getting the feel of how to mix and blend your recipe and all else that’s involved. Have patience. Have fun!
Don’t let my warnings on this hollow garden sphere project deter you. No, please don’t! I’m just trying to make a point to you that if you proceed slowly, following my tips here and on my other pages, you will surely have a garden sphere project that will be not only a success but a fabulous piece of garden art for many years to come.